


The procedure to set the clock on your Polaris RANGER varies based on what model of vehicle you own and which instrument cluster or display it features.
2-Inch LCD Display
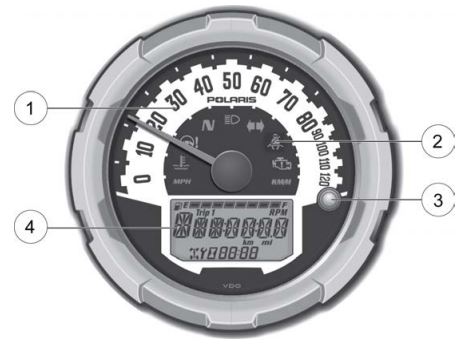
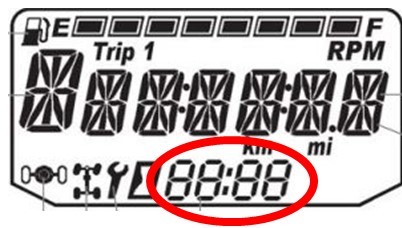
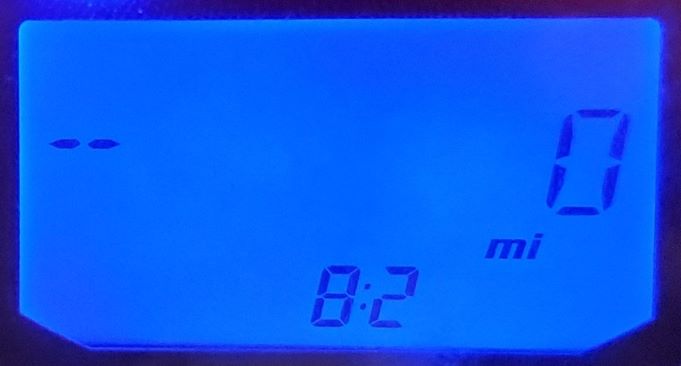
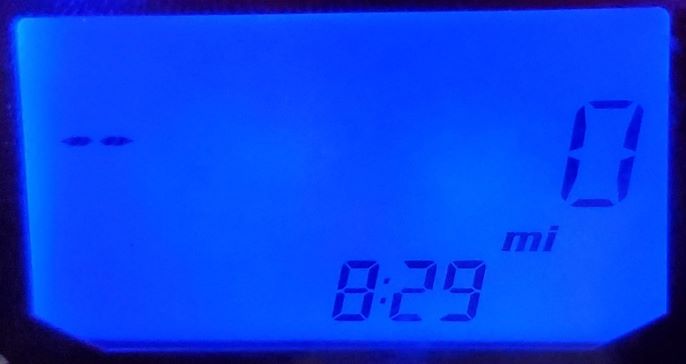
The clock can be found in the Rider Information Center (4) portion of the instrument cluster. It is located at the bottom of the screen, as shown below. Setting the clock requires the use of the MODE button (3).
The clock can display in either 12-hour or 24-hour formats. It is set to a 12-hour format at the factory.
To switch to the 24-hour format or switch back to the 12-hour format:
1. Turn the key to the OFF position.
2. Press and hold the MODE button while turning the key to the ON position.
3. When the display flashes the distance setting, tap the MODE button to advance to the desired setting, which is time.
4. Press and hold the MODE button to save the setting and advance to the next display option.
To exit the set-up mode at any time, wait 10 seconds. The display automatically exits and returns to the odometer display.
The clock will need to be reset any time the battery has been disconnected or discharged.
To set the clock:
1. Turn the key to the ON position. Use the MODE button to toggle to the odometer display.
2. Press and hold the MODE button until the hour segment flashes. Release the button.
3. With the segment flashing, tap the MODE button to advance to the desired hour setting.
4. Press and hold the MODE button until the next segment flashes. Release the button.

5. Repeat steps 3-4 twice to set the 10-minute and 1-minute segments. After completing the 1-minute segment, step 4 will save the new settings and exit the clock mode.
6. Turn the key to the OFF position.
4-Inch LCD Display
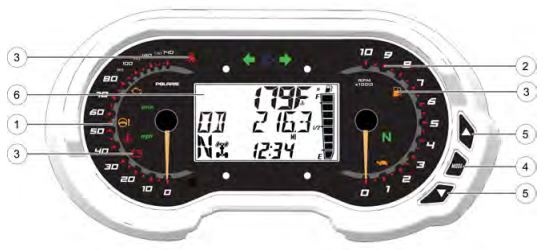
The clock can be found in the Rider Information Center (6) portion of your instrument cluster. It is located at the bottom of the screen, as shown below. Setting the clock requires the use of the MODE button (4) and the toggle buttons (5).
The clock can display in either 12-hour or 24-hour formats. It is set to a 12-hour format at the factory.
The clock will need to be reset any time the battery has been disconnected or discharged.
To set the clock:
1. Press and hold the MODE button to enter the settings menu.
2. Press either toggle button to cycle to the “CLOCK” option. Press the MODE button to select.
3. Press either toggle button to cycle to the desired setting (12 hours or 24 hours). Press the MODE button to select.
4. Press either toggle button to change each segment of the clock (hours and minutes). Press the MODE button to accept a change and advance to the next segment.
Digital Gauge
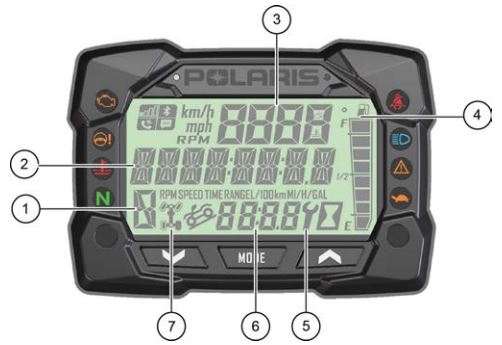
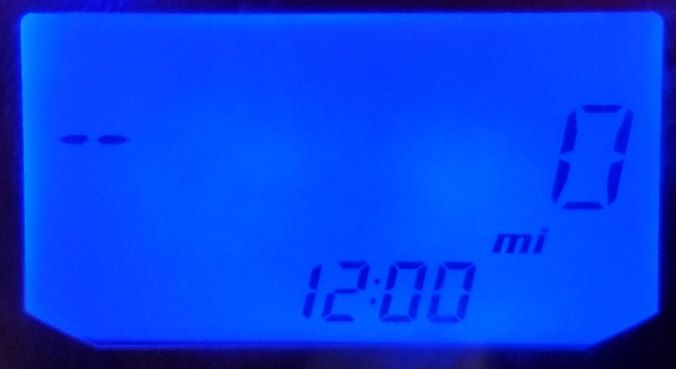
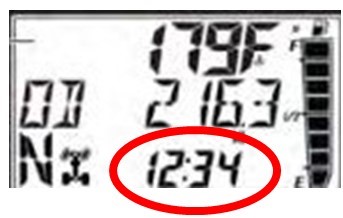
The clock (6) can be found at the bottom of the display. It can be displayed in a 12-hour or 24-hour format.
To set the time or select between 12-hour or 24-hour formats, use the Options Menu. To get to the Options Menu, press and hold the MODE button. "OPTIONS" will display on the screen for 3 seconds before showing the first menu item.
To set the time, follow these steps and refer to the corresponding image below:
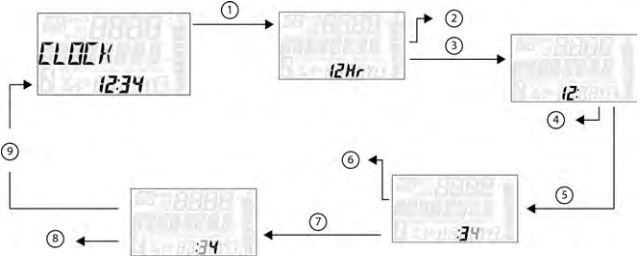
1. Press the MODE button.
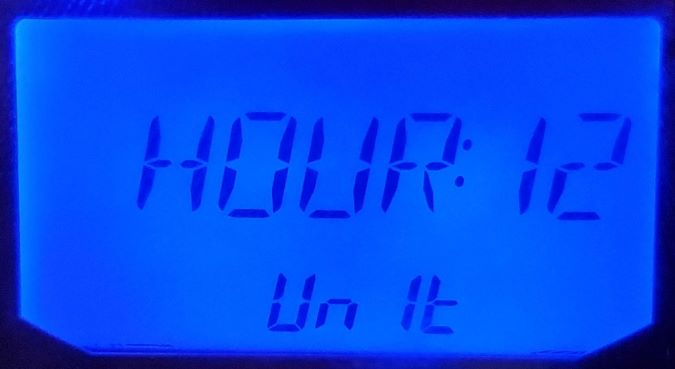
2. Toggle the Up/Down buttons to change the units (12-hour or 24-hour format).
3. With the correct unit displayed, press the MODE button, which will set the unit.
4. Toggle the Up/Down buttons to change the units (cycles hours).
5. With the correct unit displayed, press the MODE button, which will set the unit.
6. Toggle the Up/Down buttons to change the units (cycles 10s of minutes).
7. With the correct unit displayed, press the MODE button, which will set the unit.
8. Toggle the Up/Down buttons to change the units (cycles 1s of minutes).
9. With the correct unit displayed, press the MODE button, which will set the unit and return to the Options Menu.
To exit the Options Menu, the user can select the Exit Menu function from the Options Menu; can hold the MODE button and exit out of the Options Menu; or not press any button for 10 seconds, which will exit out of the Options Menu.
RIDE COMMAND Models
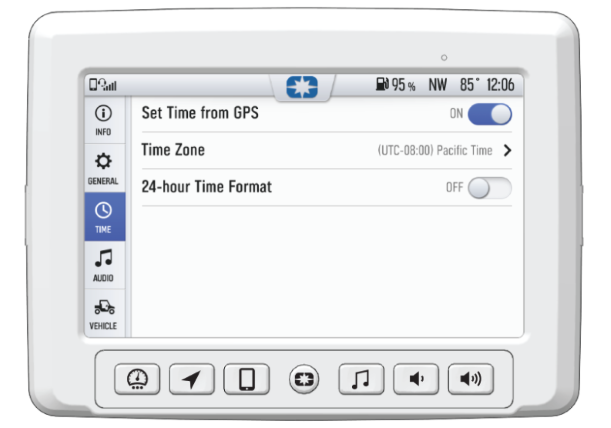
On vehicles with a touchscreen display powered by RIDE COMMAND, the clock can be set via the display settings.
1. Select the Badge Panel (Polaris icon) at the top of the screen.
2. Select ALL SETTINGS > TIME.
3. From here, you can set the time manually or by GPS location, select your Time Zone, and change time format between a 12-hour and 14-hour clock. If GPS time is turned off, it can be set manually and daylight savings time enabled or disabled.
For more information, see your authorized Polaris Dealer. Find a dealer near you with the Dealer Locator.
Maintenance tips, procedures and specifications can be found in your Owner's Manual.
To find diagrams and replacement part numbers, use the online parts catalog.
Unless noted, trademarks are the property of Polaris Industries Inc.
© 2022 Polaris Industries Inc.


