


The procedure for setting the clock on your snowmobile varies based on the type of gauge equipped on your sled.
Standard Digital Gauge
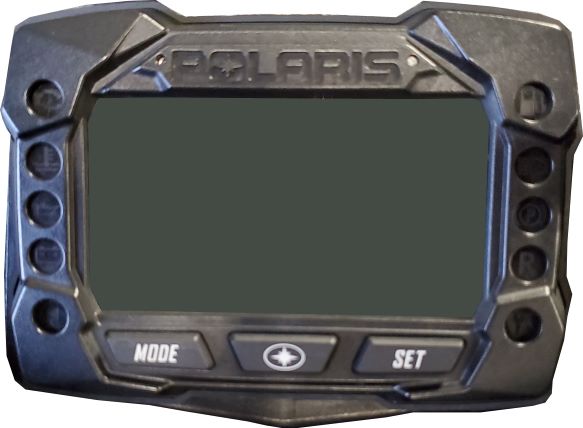
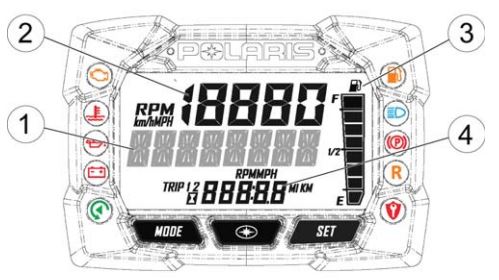
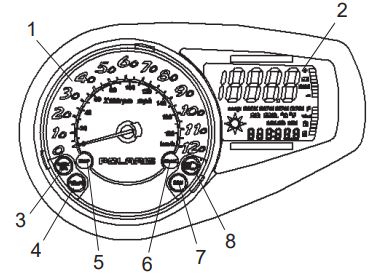
For both five-icon and 10-icon gauges, the clock can be displayed in the (4) Odometer/Engine Hour Display.
To set the clock:
1. Press and hold the center POLARIS button to enter the Options Menu.
2. Press and release the MODE button until CLOCK appears in the information display area.
3. Press and release the SET button to change units between the 12-hour or 24-hour format.
4. Hold SET or wait until the unit blinks five times and advances automatically.
5. Press the SET button to change the hour. Hold SET or wait until the hour blinks five times and advances automatically.
6. Repeat to set each digit for the minutes.
7. Hold SET to save the settings.
7S Display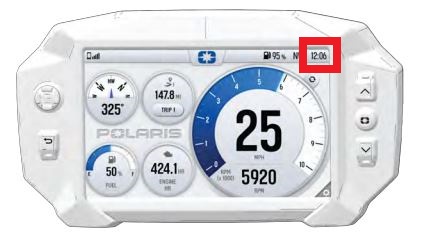
On the 7S display found on Matryx snowmobile models, the clock can be located in the icon bar in the upper-right corner of the screen. The clock is set by GPS time but can be set manually. You also can enable or disable GPS time, as well as change other time settings on the 7S.
To set the clock or change other settings, go to the Time Settings screen. To get there, first access the Badge Panel by either pressing the POLARIS icon (1) at the top of the touchscreen or pressing the POLARIS button (2) on the right of the display.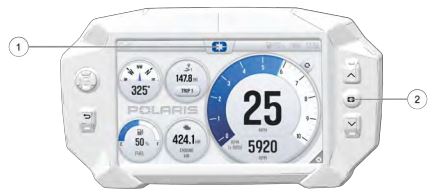
Then press the ALL SETTINGS button in the lower-right corner of the screen. Note that the icon bar will not appear when the Badge Panel is open.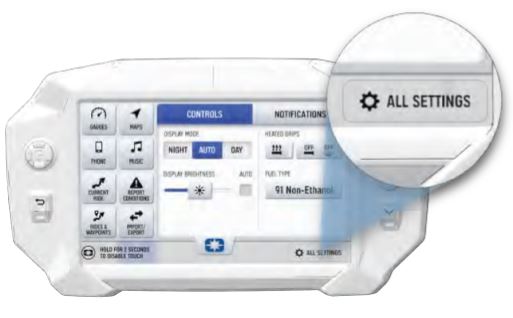
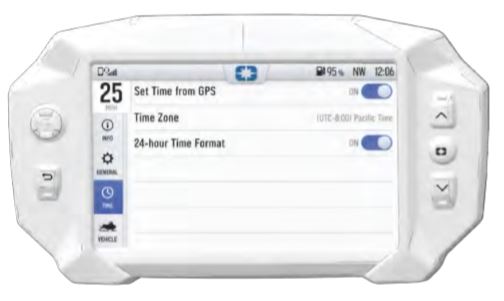
Touch the TIME button on the left side of the screen to access the Time Settings Menu. From the Time Settings menu, you can:
- Set the time from the internal GPS location
- Set the time zone
- Set the date
- Enable GPS time (automatically sets the time to the time zone you are currently in)
- Set the time format (12-hour or 24-hour)
Polaris Interactive Digital Display (PIDD)
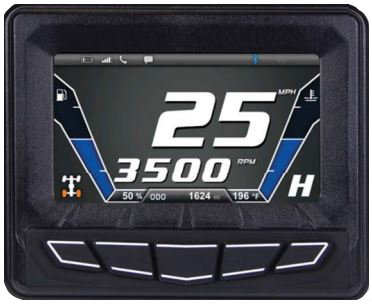
The Polaris Interactive Digital Display sets the time based on GPS location. You do not set the clock yourself.
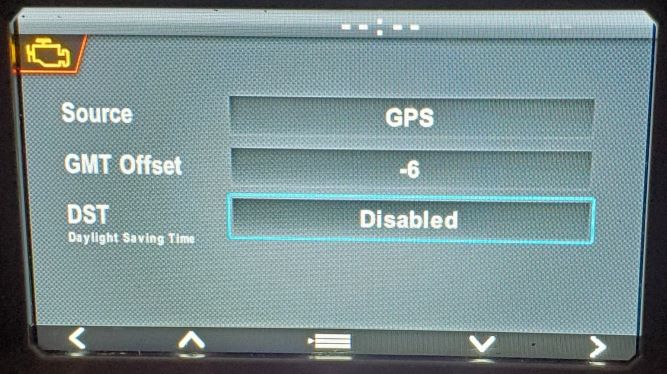
Multi-Function Display
To change the clock setting:
1. Enter the Performance Program.
2. Press and release the SET button until the clock screen is active.
3. Press and hold the SET button for 5 seconds.
4. When the hour starts flashing, press the SET switch once to advance one hour (press and hold the SET button to advance the hours quickly).
5. Press and release the MODE button to save the hour. The minutes will begin flashing.
6. Set the minutes in the same manner.
7. When finished, press and release the MODE button to save the new setting. If the MODE button is not pressed within 10 seconds, the gauge automatically will save the new entry.
For more information, see your authorized Polaris Dealer. To find a dealer near you, use the Dealer Locator.
Maintenance tips, procedures and specifications can be found in your Owner's Manual.
To find diagrams and replacement part numbers, use the online parts catalog.
Unless noted, trademarks are the property of Polaris Industries Inc.
© 2022 Polaris Industries Inc.

