


If a belt fails on your Polaris RANGER XP 900, always clean any debris from the clutch air duct and from the clutch and engine compartments when replacing the belt. Failure to remove all debris when replacing the belt could result in vehicle damage, loss of control and severe injury or death.
To replace the belt, do the following:
1. Position the vehicle on a level surface. Block the wheels to prevent vehicle movement. Place the transmission in neutral.
2. Lift the cargo box.
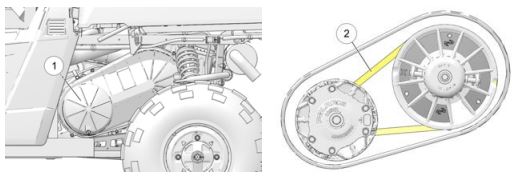
3. Remove the clutch cover (1) using a 3/8-inch socket with ratcheting wrench and extension.
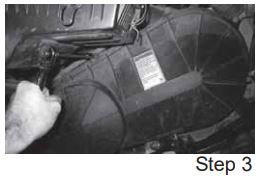
4. Pull the bottom of the cover outward and over the suspension to remove it.
5. Make sure the cover gasket does not fall out of the groove when removing the cover.
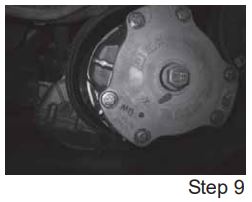
6. Squeeze the belt (2) together so that it submarines farther into the driven clutch, creating slack in the belt between the clutches.
7. Remove the belt by using the slack to pull part of the belt off the driven clutch.
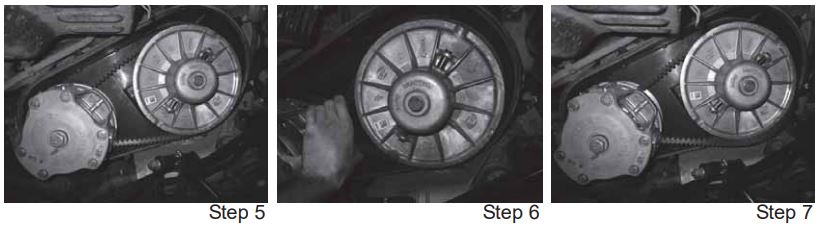
8. Rotate the driven clutch by hand until the belt is completely off.
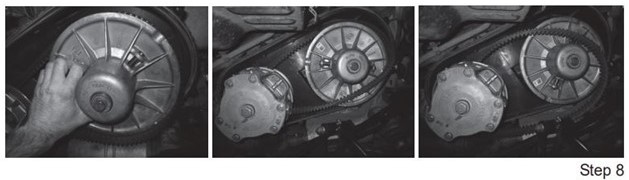
9. Slide the front of the belt out from between the drive clutch and inner clutch cover to completely remove it.
10. Remove all debris wrapped in and around the PVT system.
11. Remove all debris from the entire clutch air duct passage.
12. Check for signs of damage to seals on the transmission and engine. If any seals appear to be damaged, your RANGER requires prompt service. Your Polaris Dealer can assist. To find a dealer near you, use the Dealer Locator. Tip: Belt slip is responsible for creating excessive heat that destroys belts, wears clutch components and causes outer clutch covers to fail. Switch to low range while operating at slower speeds to extend the life of the PVT components (belt, cover, etc.).
13. To install a belt, place one end of the belt over the drive clutch. Route the belt over the top of the driven clutch and down into the groove of the clutch to allow slack in the belt. Rotate the driven clutch by hand until the belt falls into place.
14. Check the clutch cover gasket for damage. Ensure the gasket is in place and not twisted prior to reinstalling the clutch cover.
15. Reinstall the clutch cover in the reverse order of removal, fitting the top of the cover into place and then working the bottom of the cover over the suspension.
16. Install all clutch cover screws. Torque to 4 to 5 ft-lbs (5.5-6.5 Nm).
For more information, see your authorized Polaris Dealer. Find a dealer near you with the Dealer Locator.
More maintenance tips, procedures and specifications can be found in your Owner's Manual.
To find diagrams and replacement part numbers, use the online parts catalog.
Unless noted, trademarks are the property of Polaris Industries Inc.
© 2022 Polaris Industries Inc.

