


Some Polaris snowmobiles with the Matryx platform are equipped with three individual SmartWarmers heated grips. If equipped, they are found on the left handgrip, right handgrip and right thumb throttle lever. The warmers automatically adjust in response to ambient temperature and windchill to always keep the temperature of the grips at the preset temperature.
Note: Matryx RMK sleds are not equipped with SmartWarmers.
There are four heat settings:
- Low
- Medium
- High
- Off
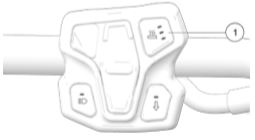
If your snowmobile is equipped with a 7S Display, you can change the heat level by pressing the Heated Grip button (1) on the left hand controls or by opening the Badge Panel on the 7S Display.
The heat levels of the grips are customizable by temperature. To change the heat settings of your hand grips, press the Polaris button to open the Badge Panel.
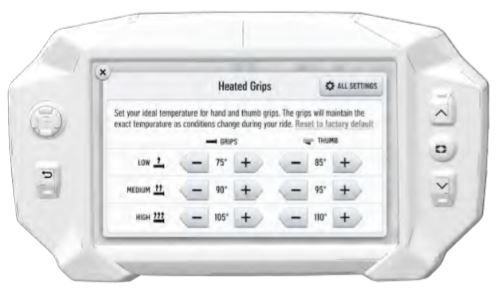
In the Heated Grips section of the Badge Panel, press the HEATED GRIPS SETTINGS button on the touchscreen. To customize the temperature of your hand grips and thumb lever, use the PLUS and MINUS buttons beside each heat level to choose your preferred setting. Click the X in the top left of the screen or the Back button to close the menu.
The Heated Grips button, shown below, changes the level of hand grip warmth to low, medium, high or off.
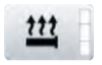
The Heated Grips Settings button, shown below, opens the SmartWarmers settings to customize the temperature of each heat level.

The Plus button, shown below, increases the grip warmth by one degree.

The Minus button, shown below, decreases the grip warmth by one degree.
To change the temperature units from Fahrenheit or Celsius, open the ALL SETTINGS menu from the Badge Panel and navigate to the GENERAL tab.
Digital Gauge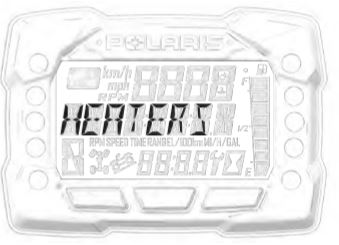
If your snowmobile is equipped with a standard digital gauge, the heated handlebar grips can be operated using the left hand controls.
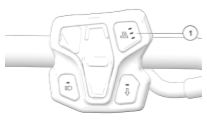
To activate the SmartWarmers in the handlebars, press the Heated Grips button (1) on the left hand controls. There are four heat levels to choose from:
- Low
- Medium
- High
- Off
The temperature of each heat level can be customized using your gauge or hand controls. Use the following procedure to adjust the temperature of your heated hand grips.
1. Start the engine.
2. Press and hold the center  button to enter the Options Menu.
3. Press and release the MODE button until HEATERS is displayed in the information display area (as shown above).
Gauge Buttons
If you are using the gauge buttons:
1. Press and release the MODE button to select which SmartWarmer to customize: grips or thumb. Press the SET button to select.
2. Press and release the MODE button to choose a heat level: low, medium or high. Press the SET button to select.
3. Use the SET and MODE buttons to increase or decrease the temperature to the desired setting.
- MODE decreases the temperature.
- SET increases the temperature.
4. Press the Polaris button to lock in temperature.
5. Press the MODE button to advance to the next heat setting.
6. Repeat steps 3 through 5 for each setting: low, medium and high.
7. Press the Polaris button to exit.
8. Press and release the SET or Polaris button to exit. The grips will adjust to the temperatures of the new settings when the hand grip warmers are enabled.
Left Hand Controls
If you are using the left hand controls:
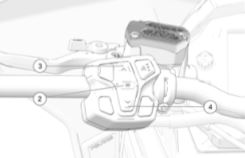
1. Press and release the SELECT button (2) to select which SmartWarmer to customize: grips or thumb. Press the SELECT button to select.
2. Press and release the DOWN ARROW (4) to choose a heat level: low, medium or high. Press the SELECT button to select.
3. Use the UP and DOWN arrows to increase or decrease the temperature to the desired setting.
- UP (3) increases the temperature.
- DOWN (3) decreases the temperature.
4. Press the SELECT button to lock in the temperature.
5. Press the DOWN arrow to advance to the next heat setting.
6. Repeat steps 3 through 5 for each setting: low, medium and high.
7. Press the SELECT button to exit.
8. Press the SET button or Polaris button on the gauge to exit. The grips will adjust to the temperatures of the new settings when the hand grip warmers are enabled.
For more on your snowmobile, view your Owner's Manual.
For more information, see your Polaris Dealer. To find a dealer near you, use the Dealer Locator.
Unless noted, trademarks are the property of Polaris Industries Inc.
© 2022 Polaris Industries Inc.

